This guide will show you how to set up an email account with POP3 and SMTP in Gmail.
Step 1 - Sign in to Gmail and go to Settings
Step 2 - Add an email account
Step 3 - Enter your email address
Step 4 - Make sure to import using POP
Step 5 - Enter your POP server settings
Step 6 - Confirm Sending from Gmail
Step 7 - Enter From Name
Step 8 - Enter SMTP Server Settings
Step 9 - Open your Gmail verification email
Step 10 - Enter your verification code
Step 11 - Check your settings

Don't have an email address yet? Our email hosting solution allows you to use your domain to send professional emails to all your contacts. Buy Email Hosting.
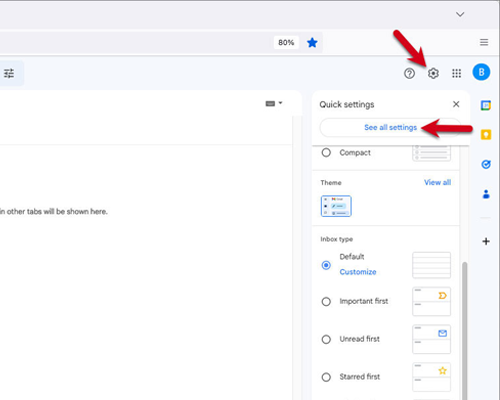
STEP 1 - Sign in to Gmail and go to Settings
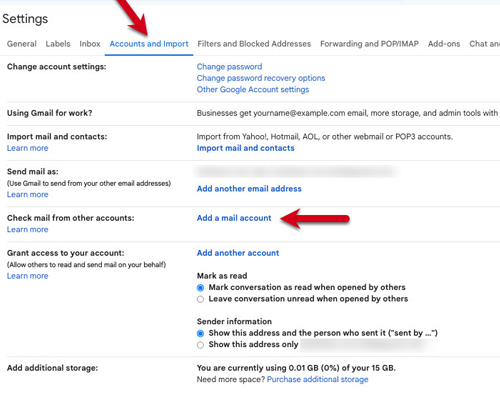
STEP 2 - Add an email account
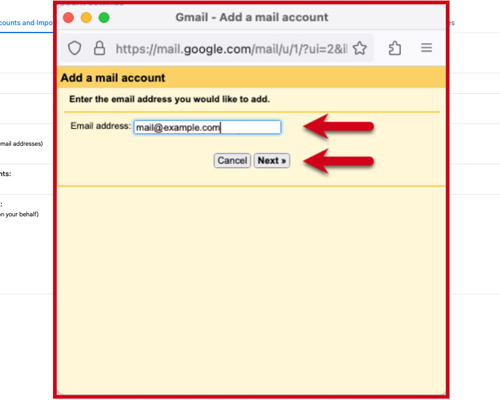
STEP 3 - Enter your email address
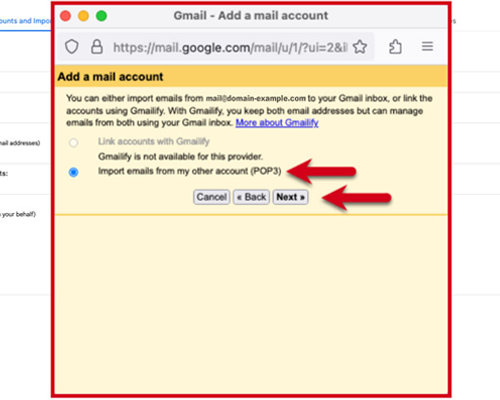
STEP 4 - Make sure to import using POP
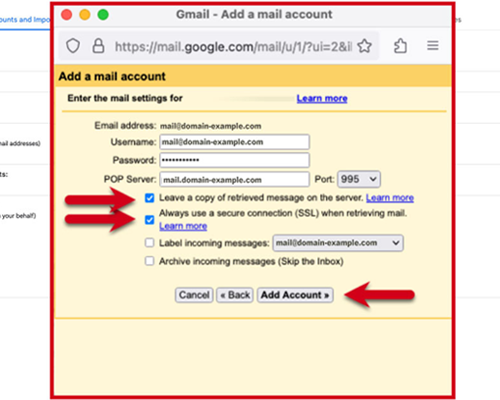
STEP 5 - Enter your POP server settings
Use the following settings for incoming mail.
Username: your email address
Password: The password you use to log in to your webmail
POP Server: mail.yourdomain.com or yourdomain.com
Port: 995
Enable the “Leave a copy of retrieved messages on the server” option. (Recommended).
Enable the “Always use a secure connection (SSL) when retrieving mail” option.
Click Add Account to continue.

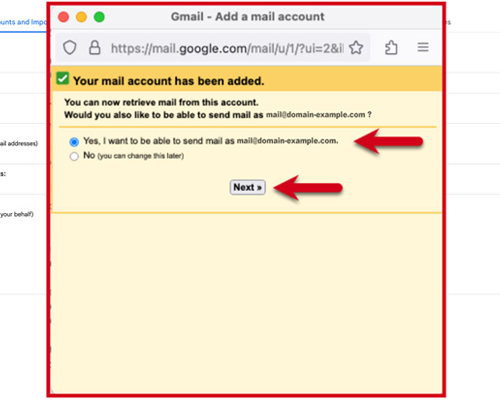
STEP 6 - Confirm Sending from Gmail
You can now receive emails from your Gmail email account. The next step is to set up your sending settings so that you can also send emails from your account.
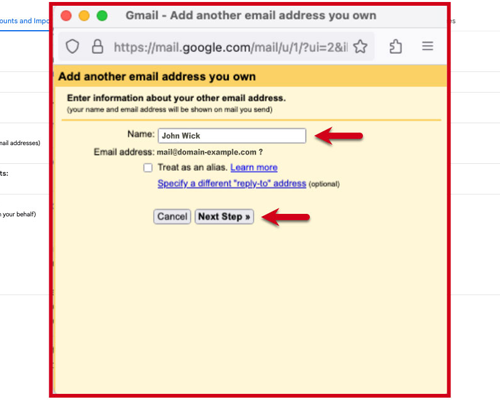
STEP 7 - Enter From Name

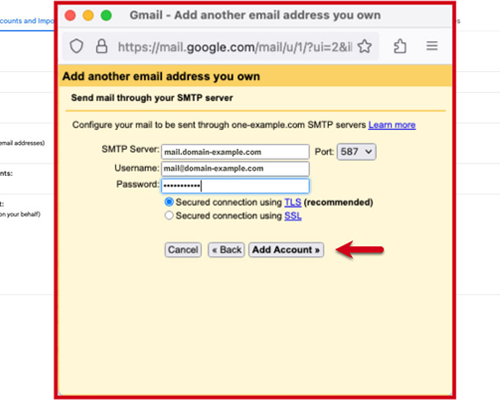
STEP 8 - Enter SMTP Server Settings
Use the following settings for outgoing mail.
SMTP Server: mail.yourdomain.com or yourdomain.com
Username: your email address
Password: The password you use to log in to your webmail
Port: 587
Secure connection: TLS
Click Add Account to continue.
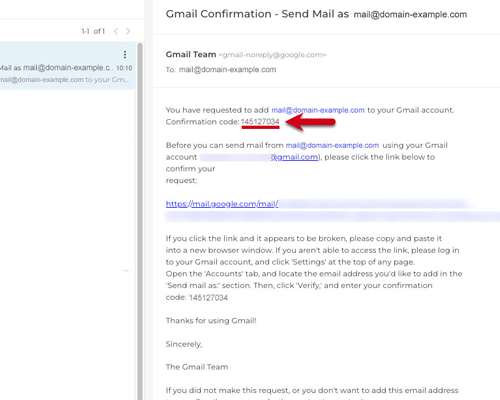
STEP 9 - Open your Gmail verification email
Gmail will send you an email with a verification code.
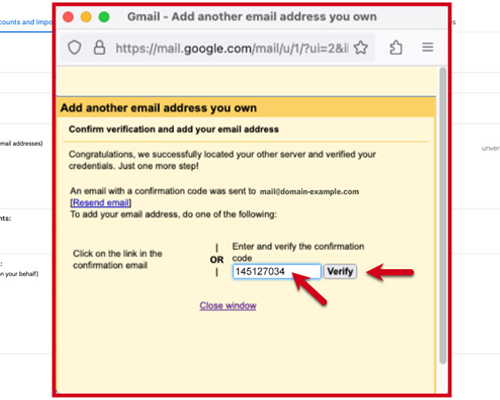
STEP 10 - Enter your verification code
Paste your verification code into the field and click Verify.
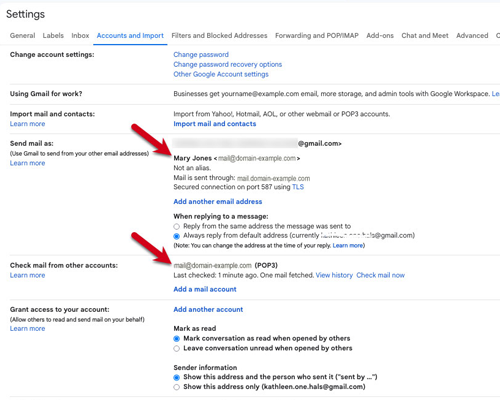
STEP 11 - Check your settings
Your account is set. You can now send and receive emails with Gmail. Check your settings to make sure they are set the way you want them.