Sponsored

Recent Blog Entries

  • No. 5 - Poison Arrow Hunter This build focuses on poisoning enemies from Elden Ring Runes a distance using various arrows. The toxic status buildup from poison arrows stacks up over time for massive damage-over-time effects. The goal is to pepper enemies with poison arrows from a distance whil...
  • In the Ultimate Accretion accepting in FC 24, the best Strikers are those that score, position, and abode it carefully in according measure. This accepting additionally includes Women's club football, starting with FIFA 24 Coins two reallife teams and abacus added as the game's seasons advance....
  • Il sistema delle buste è un ottimo modo per tenere traccia delle tue spese in contanti. Dovrai creare una busta per ciascuna categoria del tuo budget e quindi inserire il denaro per quella categoria nella busta. Lo tirerai fuori dalla busta quando spendi soldi in quella categoria. Questo sist...
View All

Sponsored

Microsoft Outlook 2010 setup

  • Setup POP3/IMAP email account with Microsoft Outlook 2010


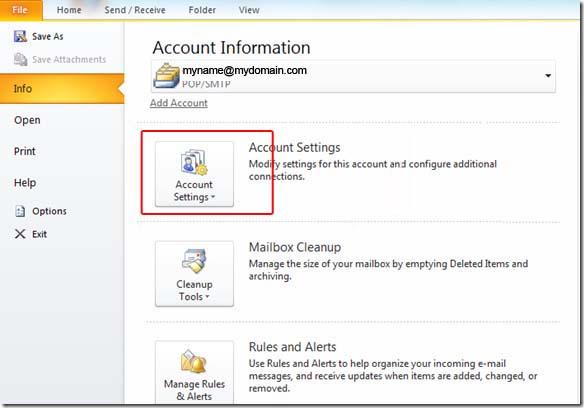
    STEP 1:   Open Microsoft Outlook 2010 and select File > Account Settings...


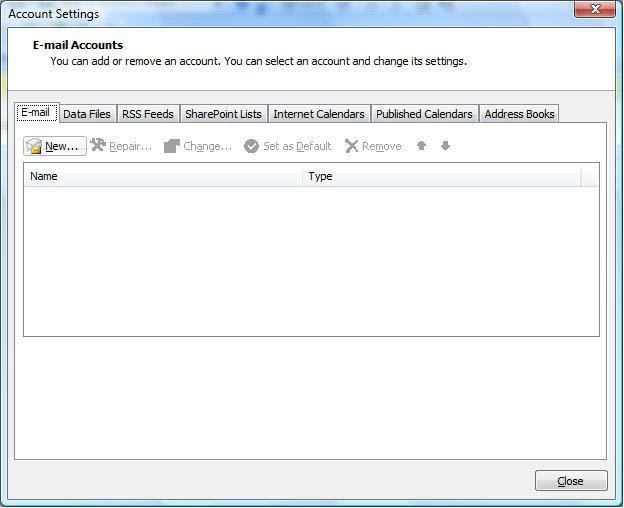
    STEP 2:   E-mail Accounts: Click the "New" button under the "Email" tab.


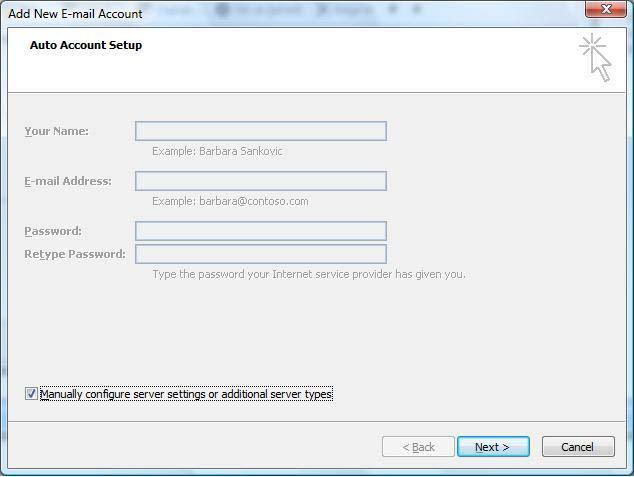
    STEP 3:   Auto Account Setup: Select "Manually configure server settings or additional server types".


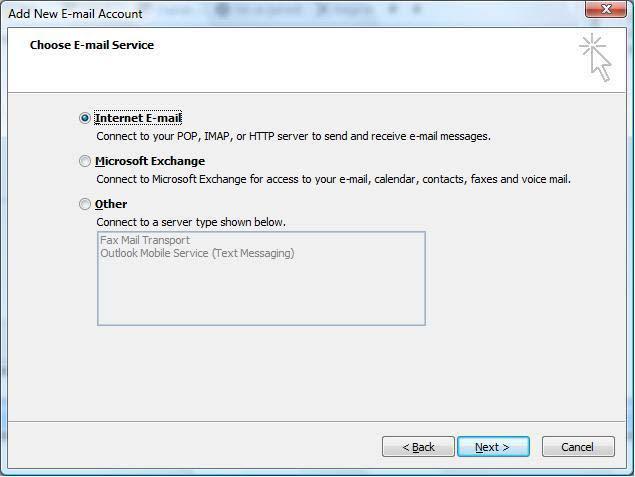
    STEP 4:   Choose E-mail Service: Select "Internet Email".


    The following informations are required::

    • Your Name: Your Full Name
    • Your full email address:
    • Incoming mail server (POP3): mail.yourdomain.com
    • Outgoing mail server (SMTP): mail.yourdomain.com
    • User Name: Your full email address
    • Password: The one you specified in your control panel when creating your email account


    STEP 5:   Once your settings look like the settings shown in this screenshot, click on the "More Settings..." button in the bottom right hand corner.
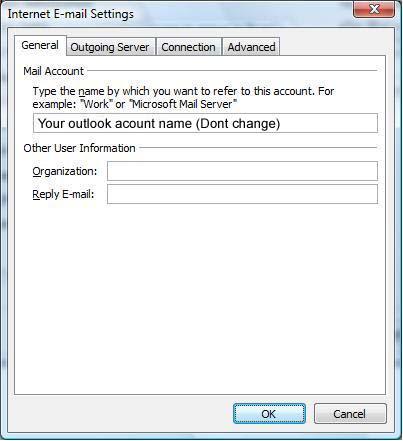


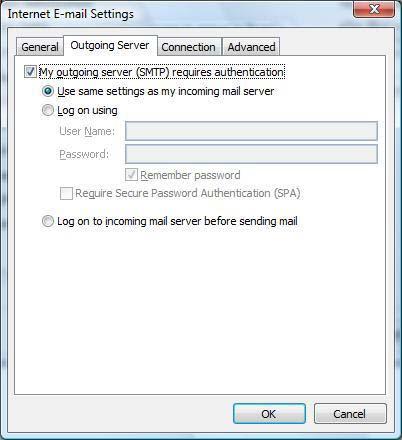
    STEP 7:   Internet E-mail Settings: Click the "Outgoing Server" tab at the top of the screen and Put a checkmark in "My outgoing server (SMTP) requires authentication" and make sure that the dot is in "Use same settings as my incoming mail server".


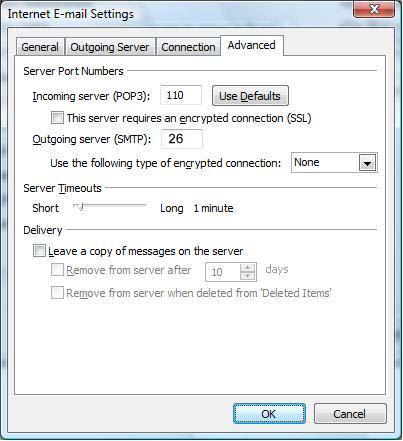
    STEP 8:   Advanced: Click on the "Advanced" tab at the top.

                   For Incoming Server (POP3): 110 and Outgoing Server (SMTP): 26


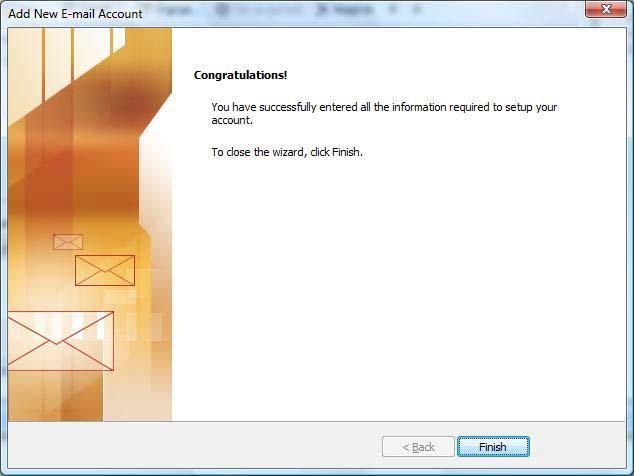
    STEP 9: Click the "OK", "Next" and then


    NOTE: As a courtesy, we provide information about how to use certain third-party products, but we do not endorse or directly support third-party products and we are not responsible for the functions or reliability of such products. Outlook® is a registered trademark of Microsoft Corporation in the United States and/or other countries. All rights reserved.

Comments

0 comments

Sponsored

Sponsors